


Here’s a recent stairlift removal case study in Leeds, West Yorkshire. This one was of note for a couple of reasons. Firstly the stairlift itself was not one we usually see – a Stannah 260 with a retractable rail. The other reason it shone out was that it was fitted very tightly to the staircase, which made it a tricky removal.
Did you know we buy second hand stairlifts? If you’ve got a stairlift you want to remove, give us a call on 0800 046 3438.


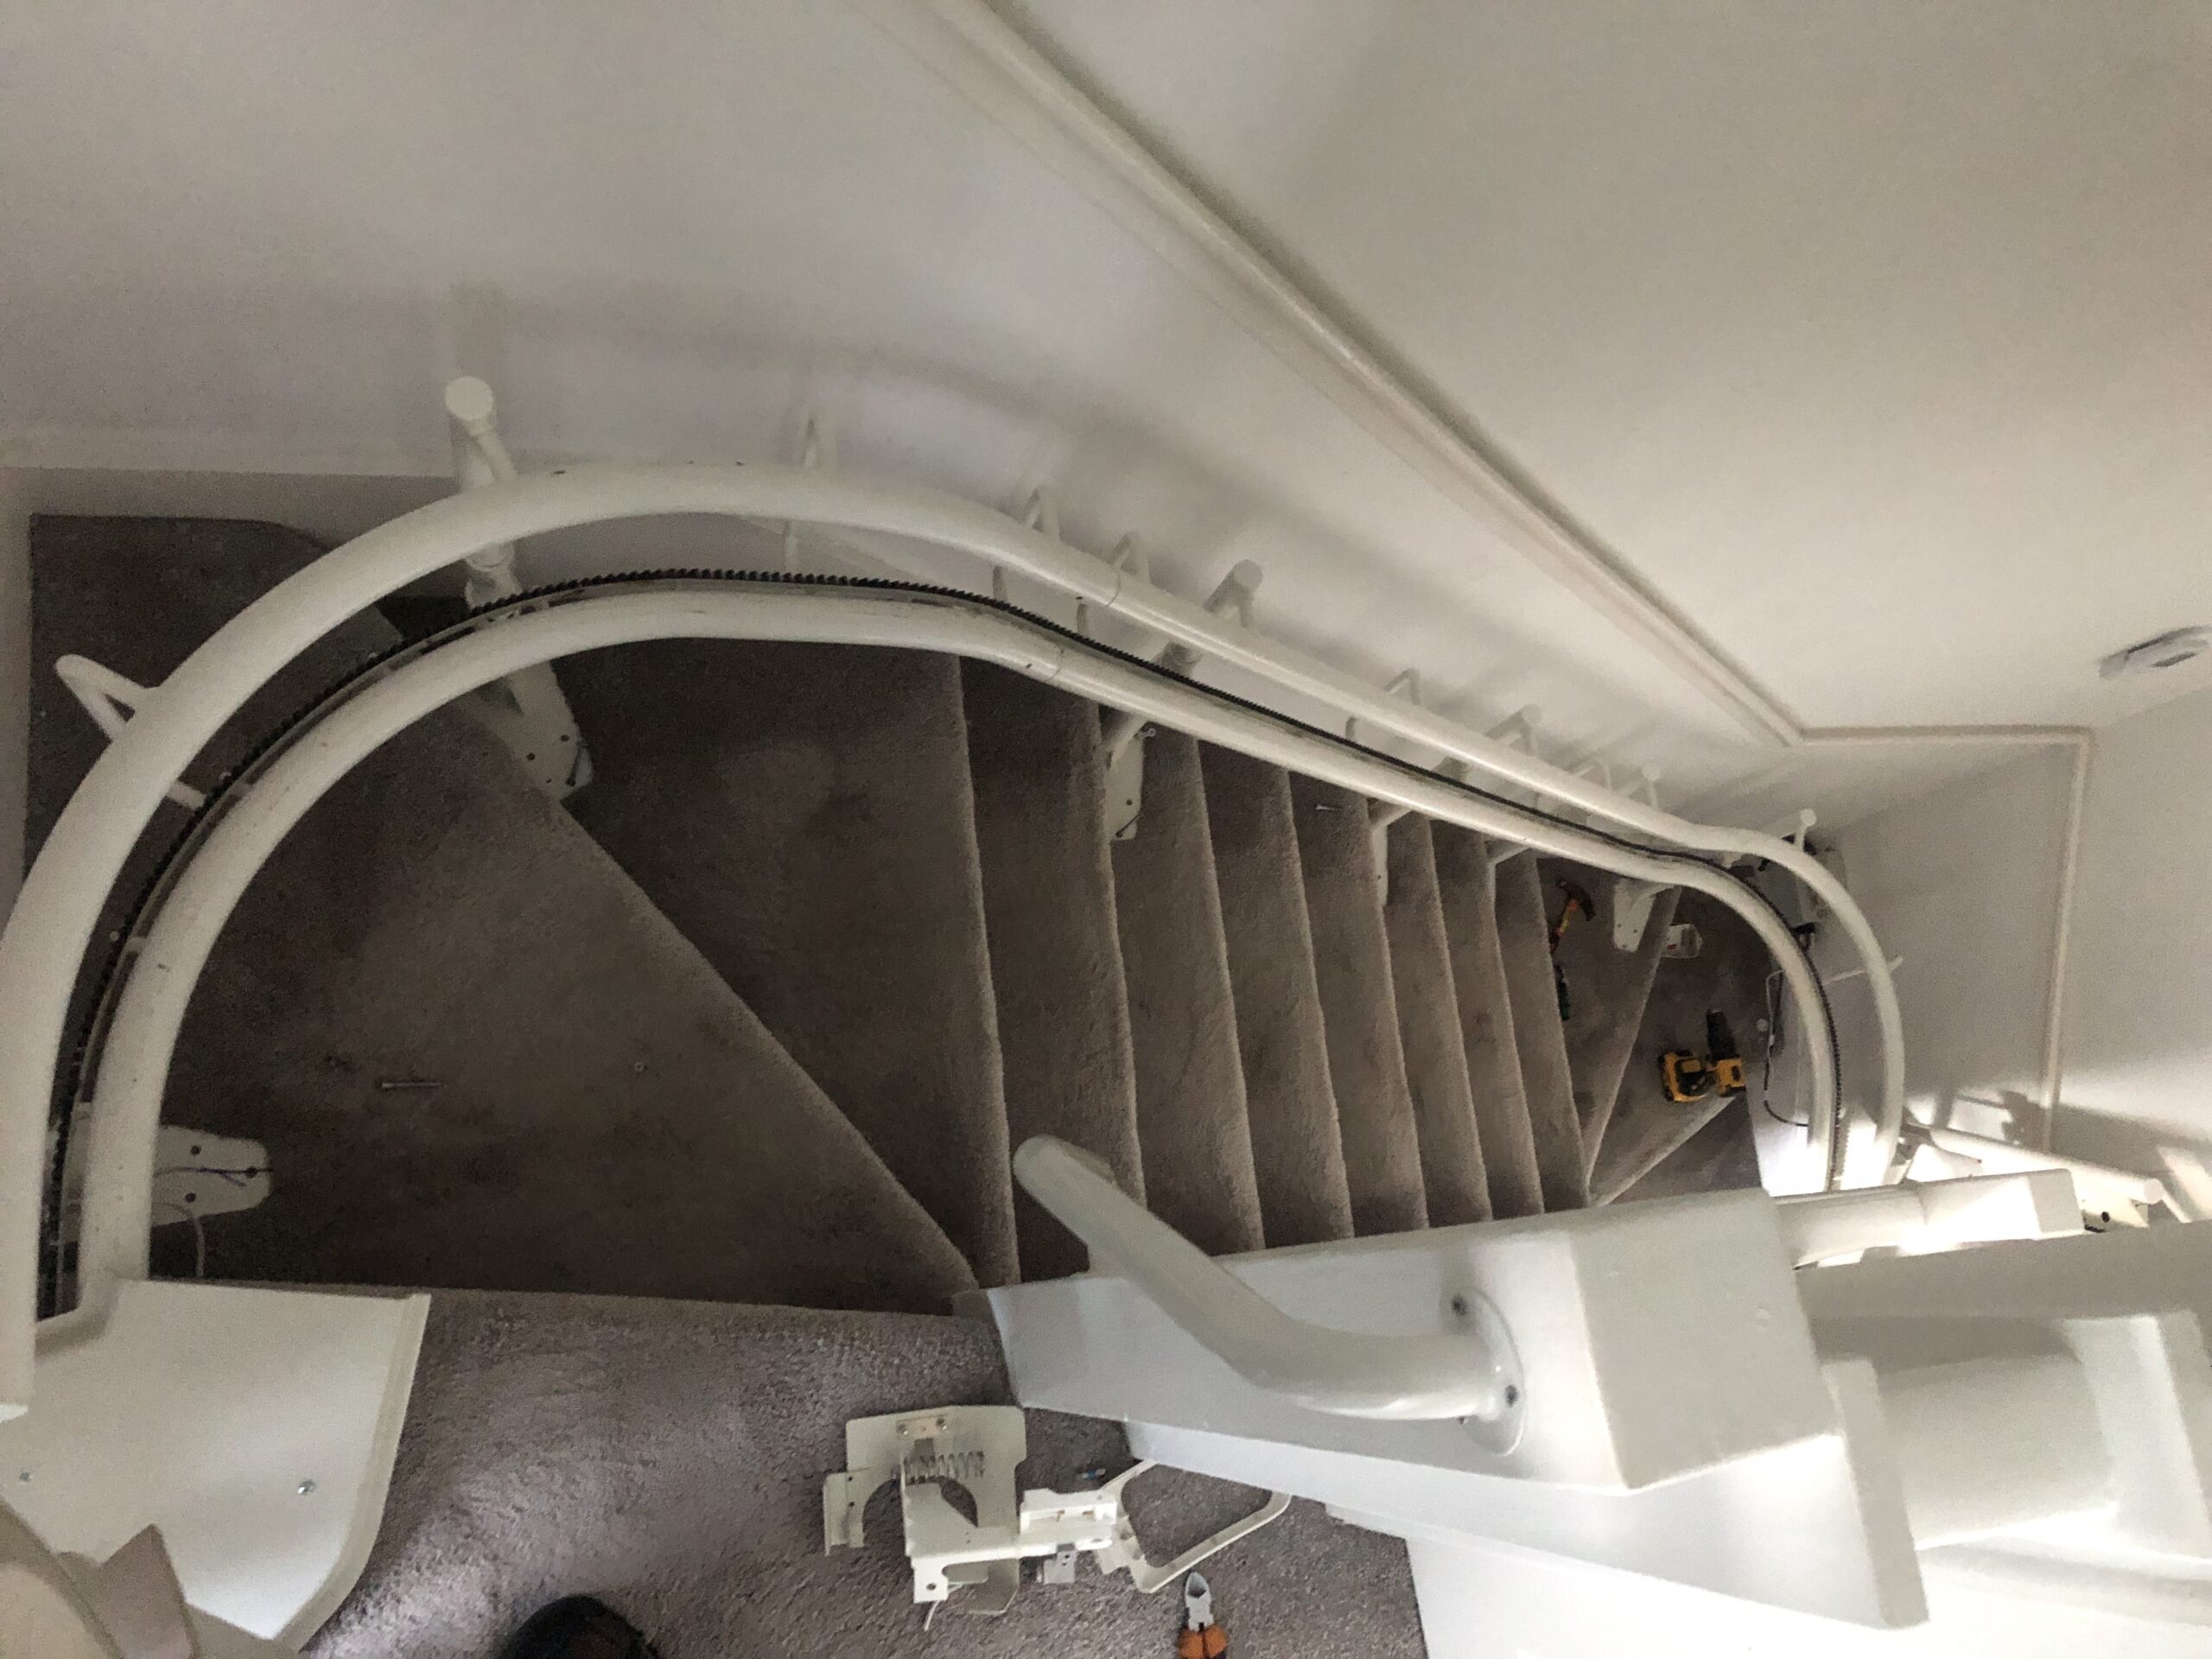
Here you can see why the retractable rail was in place. It was obviously a difficult fitting because of the doorway at the base of the stairs as well as the narrow stairway. It also had an awkward turn at the top and bottom.


Stairlift Removal – First Step
To remove a stairlift from the rail is the first job of a stairlift removal. This stairlift was working, even though there was a slight problem with the retractable rail losing power. So once we have established the stairlift is working, it needs to be driven up to the top of the rail to remove it.


In the pictures above you can see the engineer removing the end cap and charge point at the top of the rail. This allows the stairlift to be driven off the rail, for removal. The picture on the left shows the side view of the stairlift at the top step. Unfortunately, the footplate kept hitting the top step. This triggered the power cut off which is a safety feature of the stairlift.


After removing the footplate, we were able to drive the stairlift off the rail.
Stairlift Removal – Removing The Rail
With the stairlift removed, next came the tricky part of removing the rail. The main parts to be removed are:
- Rail pins,
- Draw bolts,
- Leg screws
- and finally we pull the rails apart and remove each section
The problem here was that the rail was very tight up against the wall on both sides. This made it very difficult to pull the rail apart once the various bits were removed.
Ideally, part of the rail should be left attached to the floor. This gives you more leverage when it comes to pulling the rail sections apart. But with this installation, we removed the floor screws to allow more room either side. With the floor screws removed, the whole rail could move freely and we could move it away from the walls before pulling each section apart.


The main problem with removing all the floor screws first is that there’s less traction to pull against when you are attempting to pull the rails apart.

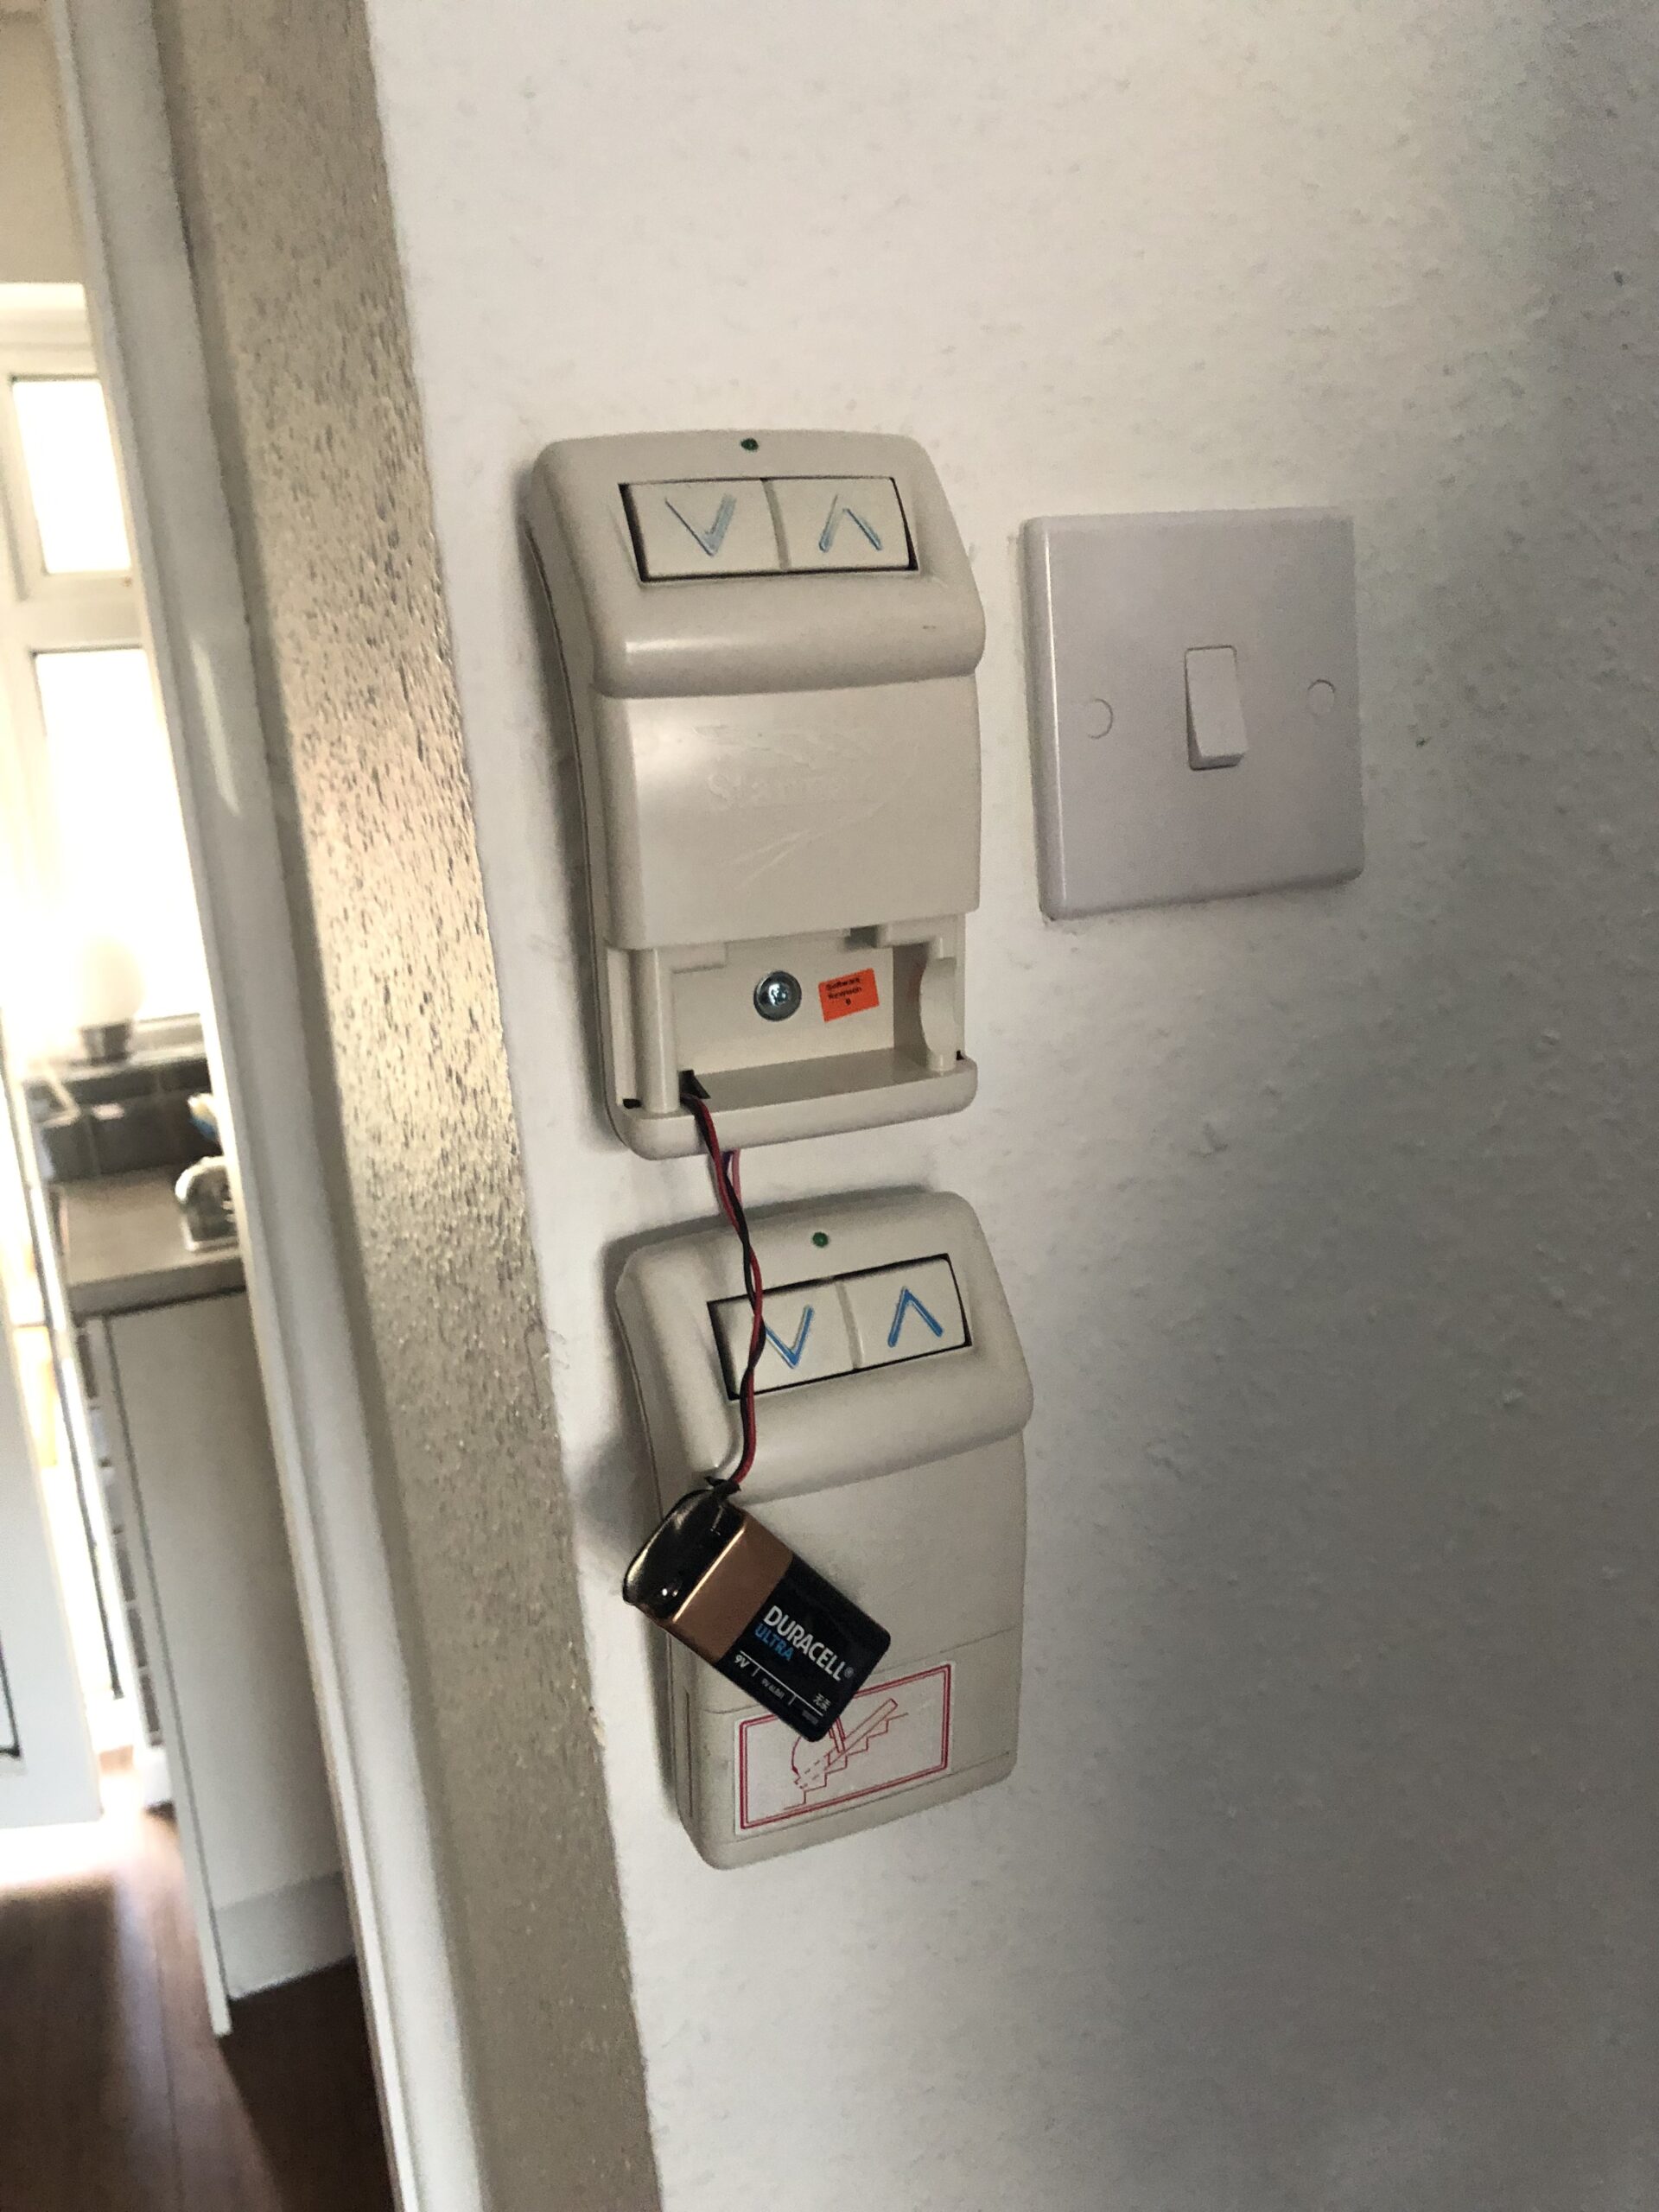
Removing The Electrics and Remote Control
Of course with all our stairlift removals, we always tidy up after ourselves and remove all the electrical points and remote control units.
Here, you can see our engineer removing the remote controls which are wall mounted.

This one was a challenge because of the tight fitting against the top and bottom corners of the staircase. The owner mentioned how during installation the fitters had struggled getting the rail in! This one was interesting because of the curved retractable rail. I personally hadn’t seen one of these “in the flesh” before! These have their own power, separate from the stairlift.
This actually had a fault but fortunately we didn’t need the retractable part of the stairlift rail to work in order to remove it! We hope you have enjoyed reading about our stairlift removal case study. Let us know if we can help you with any stairlift queries!

You can also watch one of our stairlift removals on YouTube here, or checkout our YouTube channel here.
Here’s the stairlift removal montage in video format: